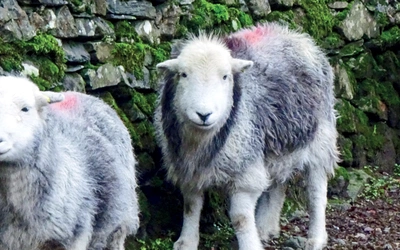
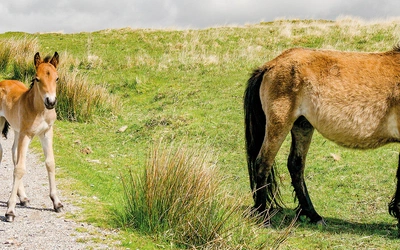
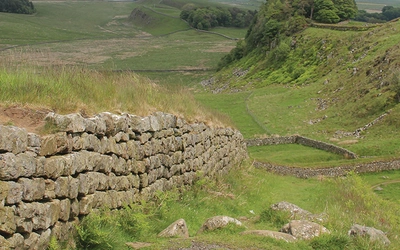
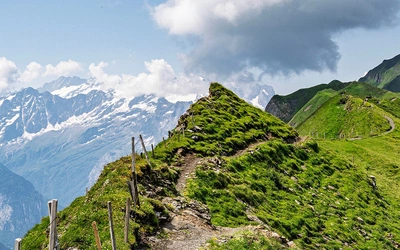
Is Skye's Cuillin Ridge on your bucket list? If so, you're in luck! Get 20% our guidebook to this iconic route and other scrambling guidebooks in our range - use code CUILLINRIDGE at checkout. Offer ends 30th April.
How to make sure your bike is safe, roadworthy and ready to go (photo by Jon Sparks)

How to make sure your bike is safe, roadworthy and ready to go

Has your bike been in the shed for far too long? Perhaps the lockdown is inspiring you to dust off the old bike and go on a cycle ride (within government limitations of course). Here Jon Sparks gives us some helpful advice on how to make sure your bike is roadworthy so you can enjoy some cycling in the sunshine.

As well as #walkingfromhome many people have been cycling more. Taking advantage of their extra time to dust off their old bikes and enjoy a cycle ride, perhaps for the first time in years, as a way of getting to essential work or taking that permitted local exercise.

We thought it might be helpful to share some tips on how to make this as easy and pleasant as possible—and particularly to help anyone who may be inspired to continue and extend their cycling when lockdown finally ends.

As I said in my Cicerone guide to the Lancashire Cycleway, 'Cycling, above all, is fun. If you’re sensibly prepared, if your bike is set up correctly for you, and if you don’t try to go too far too soon, then cycling is one of the most physically pleasurable things you can legally do in public.'

Let's take a closer look at the middle bit of that: 'if your bike is set up correctly for you'. It should go without saying that if a bike's been languishing unused for any length of time, it may need some TLC and should certainly be thoroughly checked over. If you really don't have the basic mechanical skills, it's worth noting that many local bike shops (LBSs) are still open, as they're deemed essential for the support of key workers.

However, the essential safety checks don't require advanced mechanical skills, and if you're in doubt there are lots of YouTube channels that show you exactly what to do. Two that I've found very authoritative are by Park Tool and Art's Cyclery.

M Check
Do the M Check to make sure your bike is safe

The M Check

A glance at the photo will show why the M Check is so called. It's essentially a simple prompt to ensure none of the essentials get missed and is just as useful for a routine check before every ride as for assessing a bike that hasn't seen the light of day for a decade or two. We'll take it back to front, i.e. reading L—R across the photo.

The following may seem like a lot to take in but I'm trying to cover as many of the bases as possible. Actually doing the checks will take less time than reading about them—and if you do find a problem it could save you a lot of pain.

1: How to check your rear wheel, spokes and tyres

Make sure the wheel is securely fitted into the frame. If it wobbles or feels loose, check the quick-release or axle bolts. If these are secure but you can still feel movement or play when you wobble the wheel from side to side, suspect a problem with the wheel bearings. This normally requires specialist tools and a bit of skill—a visit to the LBS may be in order.

Check the spokes are intact and feel solid, then spin the wheel and see if the rim runs true. If the bike has rim brakes—most of them will—this is easy to judge, as a wonky wheel will likely rub on one or both brake-blocks. A very slight wobble won't necessarily rule out riding, but minor wobbles tend to get worse over time so it will need attention sooner or later.

Tyres are important; they're the only thing connecting you to the road or trail. Almost certainly if the bike's been idle for any period, they will need pumping up. Do this at least 24 hours before your first ride, in case the tyre goes soft again. This could point to a puncture or a perished inner tube. Punctures are an easy fix that should be in every cyclist's skillset, but a perished tube needs to be replaced.

Whether the tyre stays inflated or not, give the outer casing a careful inspection. Danger signs are noticeable cracks in the tread or the side-walls, or spots where the tread is so worn that the fabric base shows through the runner. Replace ASAP!

When replacing tubes or tyres, be sure to get the right size. The size is normally printed or embossed on the tyre sidewall, but on older tyres may not be legible. As a rule of thumb, most hybrids, and mountain bikes more than a few years old, will have 26-inch wheels. Measure the existing tyre at its fattest point (when inflated) to find the tyre width. Road bikes, unless they're decades old, will have what are called 700C wheels. Ancient road and touring bikes may have 27-inch wheels, and you probably won't find tyres in your average LBS. There's enough tolerance that you can use 700c tubes in a 27-inch wheel, but not tyres.

If all this is confusing, I share your pain! Both metric and Imperial sizes crop up in common parlance, at least in this country. If in doubt, take a wheel (the front is usually easier) to your LBS.

You'll also need to check whether the wheel takes Presta or Schrader valves. Schrader valves are the same as car tyres: Presta are narrower, with a little nut at the top. They require different size holes in the rim, so it's not a good idea to mix them up.

2: Checking your saddle and frame

Bikes are essentially modular, and every bit can be replaced; but the frame is what holds everything together. Check carefully for dings, cracks, and rust (on steel frames). A little light rust isn't necessarily fatal, as it can be sanded and repainted, but bicycle tubes have very thin walls and deep corrosion can weaken them dangerously. Cracks, dents, and misalignments can be repaired, but it's a specialist business and can cost more than the bike is worth.

Check that the saddle is securely attached and correctly aligned, not pointing to left or right. In general the saddle should be level, nose to tail, but there's some room for personal preference here.

Thinking about the saddle also prompts thoughts about checking whether the bike is correctly set up for your body dimensions, but that's probably best left for another post; watch this space.

Front001
The front part of the M check

3: Check the drivetrain

Drivetrain is the collective term for bottom bracket, cranks and chainrings, pedals, chain, and gears.

The bottom bracket is the bit that cranks and pedals spin on. If you can wobble the cranks side-to-side, there's play, probably due to wear. If you slip the chain off the chainring and then can't spin the cranks and pedals freely, it's too tight. In either case, it isn't necessarily dangerous to ride like this but it can be annoying and will certainly accelerate the wear. Adjustment isn't necessarily difficult but does require specialist tools.

If pedals don't spin freely, or if there's play, adjustment is usually a simple job for the LBS. A little play probably doesn't mean you can't ride, but I have had a pedal spindle break on me and was lucky to escape serious injury. It also meant I had to ride nearly 30 miles home on one leg!

The chain is the bit that wears out fastest and is most subject to corrosion. Apart from tyres, it's the component that requires replacement most often. If it feels stiff running through the gears it may just be gunked up, and a bit of elbow grease with a stiff brush and suitable solvent can work wonders. White spirit is effective, but the smell is nauseating and it shouldn't be discarded into the environment. Modern chain cleaners and degreasers, available online or from your LBS for a few quid, are more effective and should be biodegradable; Green Oil products are particularly environmentally sound. For future reference, a dedicated chain-lube will be more efficient and attract a lot less gunk than oil.

If the chain is seriously worn it will no longer sit snugly on the chainring teeth and it should be replaced. Count the number of sprockets on the rear wheel—this can be anywhere from 5 to 11 depending on age of the bike and how high-end it is—and match the chain accordingly; it will be labelled 6-speed, 9-speed, or whatever (see rear derailleur photo).

Most bikes will have derailleur gears (see photos). Hub gears, such as the historic Sturmey-Archer, are harder to maintain but need less attention overall because their workings are sealed away from the muck of the road or trail.

If derailleur gears don't shift properly, the most likely culprit is actually the gear cable. Fortunately these are cheap and relatively easy to replace, requiring no specialist tools beyond pliers, a small screwdriver, and a couple of Allen keys. Getting the tension just right is the fiddly part and this is where those online videos are your best friend. Sometimes such adjustment is all that's needed.

Rear001
The rear part of the M check

4: Make sure your steering and brakes are safe

Start with the handlebars; make sure they are secure in the stem, with no rotation or feeling of looseness. Make sure the stem is secure too: the usual procedure is to stand astride the front wheel, gripping it securely between your thighs, and attempt to twist the bars side to side. If there's movement, it probably just needs a tweak with an Allen key to fix. Make sure the stem is correctly aligned with the front wheel, too.

Also check for looseness in the headset. Apply the front brake with one hand and try to rock the bike back and forth to feel for play. A tiny bit of play isn't fatal, but should be fixed as soon as reasonably possible; serious play is potentially dangerous.

Stem
Parts of the stem

Brakes, of course, are crucial for safe riding. Check that the calliper moves easily when you pull the lever, and that both brake-blocks press on the rim at the same time—and well before the brake lever pulls all the way back to the handlebar. Usually, solving any problems is a matter of tightening or perhaps replacing the cable; this is not a difficult job and usually only requires an Allen Key (on older and/or cheaper bikes a ring spanner may be needed instead).

Check too that the brake-blocks aren't excessively worn. New brake-blocks aren't very expensive, and fitting them isn't hard, but if in any doubt, as ever, your LBS is there to help.

5: Safety checks for your front wheel

Essentially you'll do the same checks on this as on the rear. You may find that front and rear don't have identical tyres, but it's very unusual for the wheel sizes not to be the same, and if you're replacing tyres or tubes it's normal to fit the same to both wheels (there are exceptions, especially in hard-core mountain biking, but we can leave those aside).

With luck, none of that took too long, and the bike is now safe to ride. Comfort is another matter, and that's what we'll look at in our next post.

To read more articles like this get our newsletter

Sign up for 20% off your next purchase and to be the first to hear about exclusive competitions, special offers, and news from Cicerone.