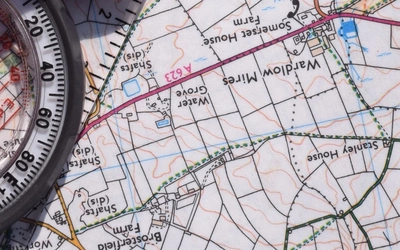
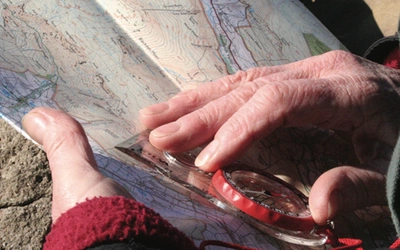
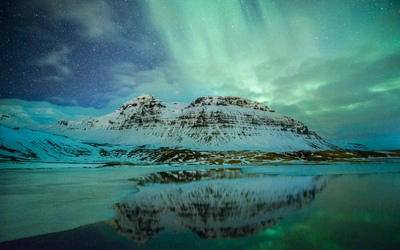
Outdoor Photography - Landscape, Action and Wildlife photography
This book is for outdoor enthusiasts who want their photographs to do full justice to the quality of their outdoor experience. Throughout the book the emphasis is on practical advice – essential technical concepts are introduced and explained, and there are chapters on landscape, action, wildlife and close-up photography.
Outdoor Photography
Landscape, action and wildlife photography for the outdoor enthusiast
Author
Cover
Paperback - Laminated
Edition
First
ISBN_13
9781852843564
Availability
Published
Price
£12.00
Search inside this Book

Chapter 3 - Shooting landscapes
In any outdoor activity, it’s not just what you do but where you do it that’s important. Even a short country stroll will take you to places unsuspected by those who never leave the roads. Mountaineers, cavers, sea-kayakers all get to places most people will never see and may never even have dreamed of. Whether it’s to show your friends, or just for your own memories, you’ll surely want pictures that capture the special qualities of these special places.
On the face of it, shooting landscapes should be easy. Landscape just sits there and waits to be photographed. You don’t need expensive specialised gear: an ordinary camera and an ordinary lens will do fine.
However, shooting landscapes well turns out to be less easy. There are a number of reasons for this. Some of them are technical, but a lot of technically competent pictures still don’t really get the message across. Indeed, in their obsessive pursuit of technical excellence some people seem to forget what the picture is actually about.
Seeing the landscape
Landscapes are big and complex. When you get actively involved with landscape, you see much more of this richness and become far more aware of its detail and texture. A kayaker will be very conscious of the way a river flows, of eddies and stoppers and calmer pools. A climber will be very focused on the fine detail of rock, its cracks and holds, the frictional qualities of its texture. A walker or a cyclist will be highly aware of gradients and path or track surfaces.
Many of these qualities are subject to change. A lake which is a perfect mirror in a windless dawn may be whipped up to white-capped turbulence just a few hours later. Landscape changes constantly. There are gross physical changes, like landslides and avalanches; trees fall and rivers change their course.
Complete stillness is a rare and usually short-lived phenomenon. Most landscapes – and most landscape photographs – have movement in them somewhere. Even when there’s not a breath of wind, and no running water in sight, the sun moves continually across the sky: the light is constantly changing.
These things naturally affect the way you look at a landscape and the feelings you have about it, and should influence what you want to say about it in photographs. The clearer you are about what you want to say with the shot, the better. ‘What a beautiful place’ is just a start. Think about it:
- What makes it beautiful?
- What’s special about it?
- Is it inviting or forbidding?
- Does it awe you with its sheer scale and grandeur or does it seduce you with a quiet, delicate beauty?
Framing the landscape
Perhaps what makes landscape hard is exactly the quality that appears to make it easy: it’s just sitting there. It isn’t neatly parcelled up into photograph-sized chunks. With a portrait or an action shot there is usually a definite subject. Fill the frame with it, get it sharp and correctly exposed, and the subject will probably speak for itself. Landscape photography doesn’t work like that. Landscape includes everything from the grass under your feet to distant mountains and the sky above. The challenge is how to pack all that into a two-dimensional rectangle. Put it another way: how do you fill the frame with your subject if you can’t say exactly what your subject is?‘What to point at’ can be the hardest decision you’ll have to make when taking a landscape photograph. In other words, framing is fundamental.
Framing begins with seeing... But seeing means more than just looking in the right direction. It means really being aware of what you’re looking at. This is basically very simple, but simple isn’t quite the same as easy. It calls for concentration and really paying attention to what you see, both directly and through the viewfinder.Many books talk about ‘rules of composition’, especially the notorious rule of thirds – whereby if a scene is mentally divided into thirds both horizontally and vertically, the main points of interest lie where those lines intersect. This might appear to be a useful short cut but is all too often a dead end. Half of the shots given as examples of this rule conform to it very loosely, if at all. Some books tell you that the rule of thirds is the same as the golden section (a doctrine, dating back to Ancient Greece, about the most harmonious position for prominent horizontal or vertical divisions), when it demonstrably isn’t. These so-called rules aren’t as simple as they seem, and experience suggests that they aren’t that useful either.
It’s pretty hard to think about ‘rules’ and at the same time stay focused on the feeling and emotion of the moment. Many of the greatest photos ever made don’t conform to any known rule. Neither does landscape itself conform to any simplistic rule, so why should one be imposed on a landscape photograph?
‘Composition’ vs ‘framing’ Because so many discussions about ‘composition’ are weighed down with rules, the word itself tends to be inextricably linked with them. This is why the word has only appeared twice so far in this book, and won’t be used again. The alternative term, ‘framing’, denotes exactly what we’re doing and doesn’t carry anywhere near as much baggage.We need a different way to think about framing. Viewfinders have their limitations, but they’re still an essential tool. And, like any tool, how you use it is more than half the battle. The central skill is seeing the whole picture, and it is a skill that anyone can develop with practice.
But looking at the viewfinder will only tell you about the picture you will get from a particular spot, looking in a certain direction, with a given lens. It won’t tell you what difference it will make if you move back a few metres, or switch to a different lens. You can do this by trial and error, but if you stop to check through the viewfinder after every little adjustment, it’ll take forever. Landscape photography isn’t supposed to be that slow! This is why looking at the scene directly is just as important as using the viewfinder.
- Try to think in terms of looking at the viewfinder rather than through it. With an SLR, this is what you do anyway: what you are actually looking at is the focusing screen. In a sense, it already is a picture. The viewfinder of a compact is much more like a simple window, but it’s just as important to try and think of it as if it was a picture
- Consciously observe the edges of the frame, especially when you’re trying different angles of view. It helps you to identify what you’re leaving out, and perhaps also what you should leave out. If you use a zoom lens, objects can appear and disappear at the edges of the frame as you zoom in or out. Being aware of the edges also helps you to keep the horizon level
- Looking at what’s contained within the frame – the picture content – is the other side of the coin. The camera can’t read your mind and doesn’t actually know which bits of the scene you are interested in, so it’s no good blaming the camera if you get more than you thought you were getting: it’s up to you to see what’s there
We can all anticipate, to some extent, what will happen when we shift position or change lenses. The more we do it, the better we get at it. This anticipation is one aspect of visualisation. As you develop these skills you will spend less and less time looking through that fiddly little viewfinder, and more and more looking directly at the world. Increasingly, you will have a shrewd idea exactly where to stand, and which lens to use, before you ever raise the camera to your eye.
Visualisation means more than just seeing the raw ingredients of the shot. It also means being aware of the differences between the way the camera sees and the way the eye sees. We’ve already alluded to depth of field, at which we’ll look again shortly, and at the way the camera deals with movement, with colours, and with big differences in brightness.
One of the most important factors remains the ‘mental zoom lens.’ Physically, the human eye has only very slight zoom ability; it’s like a fixed focal length lens. It’s the brain which can switch almost instantaneously from ‘seeing’ a wide-angle view to a narrow ‘telephoto’ one. This ability is very powerful, and very useful to the photographer.
Suppose, for instance, that your attention is caught by a beautiful, shapely tree on a nearby ridge, with a distant hillside beyond. To your eye it stands out clearly, but in the final shot the tree almost merges into the similarly coloured background of woods on the far side of the valley.
There are several ways that you could deal with this:
There are always possibilities, but you can only exploit them if you’re aware of the potential problem.
- You could change your viewpoint so that the tree stands out against a different background (the sky being an obvious option)
- If the lighting conditions are suitable, you could wait a few minutes for the shadow of a cloud to fall on the background so that the sunlit tree stands out against it – or vice versa
- You can limit depth of field so that the tree stands out sharply against a background in softer focus
Different angles
Landscape photography essentially deals with fixed objects. We can move the odd pebble, but not a tree or a mountain. Yet landscape photographers often talk about ‘organising’ or ‘arranging’ the different elements in their pictures.
The one thing you can move is the camera.There are several ways to change the framing of your shot. Switching lenses, or using a zoom, is only one of these. Even with the simplest of cameras, with one fixed lens, you are not fixed. You can move forward, back, left, right, even up and down. Try all of these options, and observe the results carefully.
If you only have a fixed lens, and you want to make a particular feature larger, your only option is to move closer. This does not have the same effect as staying put and switching to a longer lens. Zooms and telephotos are wonderful things, but they can encourage lazy photography.
There is every difference between snapping on a longer lens to take a ‘closer’ picture of a scene, and actually walking forward into it. If there’s a tree 50m away and a mountain 10km away, zooming in will enlarge both of them equally within your frame. Walking forward 25m makes no discernible difference to the apparent size of the mountain, but halves the distance to the tree, making it look much larger. Changing the relative sizes of two objects in this way changes their relative importance in the frame, and with it the balance of the picture.
Practise moving It’s a good exercise to go out occasionally with just one fixed lens. You’ll travel lighter, but not necessarily faster; instead of changing lenses, you’ll spend time moving back and forth and side to side and maybe seeing more.Don’t neglect the third dimension, either. There’s no law that says every shot has to be taken from a standing position, with the camera at eye level. Scrambling up a boulder or outcrop can expand your view considerably, while getting low draws in more foreground detail. Grubby knees are a small price to pay for a really good shot.
Foregrounds and panoramas
The ‘panoramic’ option found on many cameras simply masks off the top and bottom of the normal frame. The print is produced from only part of the negative. This is wasteful, and means that greater magnification is required to produce a decent-sized print. If the shot needs cropping you can always do so later, either by getting a ‘selective’ print made, or by using a pair of scissors. It’s curious that people are frequently aghast at the thought of chopping up prints with scissors, yet have no such inhibitions about using the crop tool in image-editing software.
The usual effect of chopping off the top and bottom of the picture is to chop off the sky and the foreground. What’s left is usually the middle to far distance. This may satisfy those who think you can see it all from a car window, but the active outdoor person is aware of, and cares about, more than just ‘the view’. The foreground is grit under your boot soles, the icy stream you’ve just crossed, the crystal glinting on the corner of a rock, a bright mound of moss campion.
If you really want to convey that feeling of ‘being there’, then foregrounds are vital. To make the most of foregrounds, there’s no substitute for a wide-angle lens, by which we mean anything from 35mm to 20mm, 18mm or even wider. You can use these to encompass either the broad sweep of a landscape, or a large but relatively close subject. However, wide-angles have a habit of taking in things you don’t want as well as those you do, so watch the whole frame.
Using a wide-angle lens draws nearby objects into the frame, and often that’s the whole point. However, if the main reason for using the wide-angle is to take in the broad sweep, you don’t want the foreground to be too dominant. Tracks, rivers and valleys can ‘lead’ the eye into the view, but more solid objects can ‘block’ it, especially if placed centrally.
The wider the lens you’re using, the closer you may be to your foreground objects. Even a shift of a few centimetres in your camera position can have a big effect on where or how large they appear, while making negligible difference to distant skylines. Get close, get involved, but keep looking at the whole frame.


