How to photograph the northern lights

Seeing the northern lights can be a once-in-a-lifetime experience. Photographing this spectacular, natural phenomenon is difficult, but James Rushforth has this advice.
Caused by electrons from the sun exciting atoms and molecules in the Earth’s atmosphere to subsequently release photons of light, the aurora borealis or northern lights are a magical phenomenon that everyone should endeavour to experience at least once.
Owing to the Earth’s magnetic field, which pulls the electronically charged particles towards the poles, the lights are generally best viewed at extreme northerly (or southerly in the case of the aurora australis) latitudes.

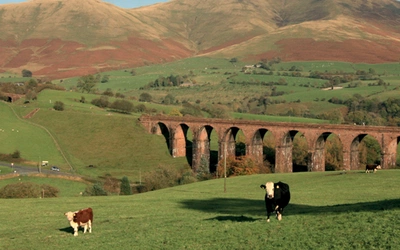
While Iceland, Greenland and Scandinavia are the usual destinations of choice for aurora hunters, the lights can sometimes be seen in the UK during periods of high activity – albeit only faintly.

Both the strength and character of the aurora borealis vary wildly; sometimes the lights appear as a weak glow on the horizon difficult to discern with the naked eye, while on other occasions the sky comes alive with dancing ribbons of light.
Green is the most common manifestation, although it is also possible to see pinks, reds, blues and even yellows. These colours are largely determined by the elements’ chemical composition (usually oxygen or nitrogen) and the agitated particles’ altitude.
Arcs and bands that stretch across the skyline are the most common configurations, while pillars, ribbons, curtains and coronas are only seen during high activity events.
Photographing the aurora is difficult, both due to the low light associated with astrophotography and the dynamic nature of the lights. Their fickle nature means it is worth doing some research in advance, so photographers are ready when the stars quite literally align.
For those relatively new to astrophotography, it is worth taking your camera out at night (even if it’s just in the back garden) to practice its operation in the dark.
Where to see the Northern Lights
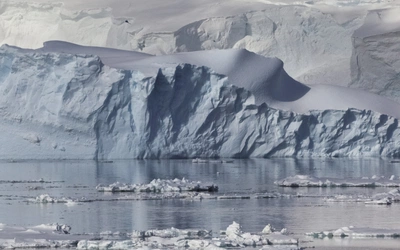
Generally speaking the best northern lights displays are found beneath the auroral oval, at latitudes of between 60 and 75 degrees. Thus northern Scandinavia, Greenland, Iceland, Russia, Canada and Alaska are all perfect geographic locations for observing the phenomena.

Planning and preparation
For best results it is worth giving some logistical thought to an aurora shoot, planning a suitable location carefully.
- While the aurora is active all year it requires dark skies to see clearly, making the long northerly latitude summers unsuitable. The best season generally extends from late August to mid-April, although the long hours of darkness towards midwinter increase the likelihood of spotting the lights.
- The weather and aurora forecasts can be checked online or using apps such as My Aurora Forecast, where a Kp scale from 0 to 9 predicts how active the lights are likely to be. Pay attention to the cloud cover maps as a clear sky is essential.
- As the name implies, any activity usually starts in the north, although during geomagnetic storms the lights can often be seen in all directions. Plan a suitable venue with a strong foreground and unobstructed view of the sky.

The Kp scale explained
The Space Weather Prediction Center publish a daily Kp index. This scale has a range from 0 to 9, with a higher number indicating increased activity with the below characteristics:
Kp 1 to 3: Quiet activity and feint. The predominant colour is green, which often manifests as a weak glow on the horizon.
Kp 4 to 6: Very active, yellow, bluish, or purple tones. Possibility of ribbons, bands and pillars. Aurora coronas are also possible.
Kp 7 to 9: Powerful aurora storms with high activity. A strong possibility of multiple colours, including red.
Please note that while the scale is a good indicator, it is not foolproof and can change rapidly. Anything above a 3 is generally very good, though if time is short and the skies are clear it is always worth heading out anyway – you never know.
Photographing the aurora borealis
Witnessing the aurora for the first time can be overwhelming. Try to contain your excitement and observe the following tips:
- Arrive at the chosen location early, preferably in daylight. This allows time to familiarise yourself with the venue, scout the best perspectives and get focused correctly.
- A simple yet striking foreground is key to a good aurora image; try not to get too absorbed in the sky
- Keep looking in all directions – it is easy to fixate on a particular area of activity, only to find a more impressive display taking place behind you
- Learn to use your camera and tripod quickly and competently in the dark to maximise efficiency
- Once you have some good images it is worth stepping away from the camera, finding a comfortable spot and enjoying the show with your own eyes

Equipment, focusing and settings
The constant motion of the dancing aurora often requires a fast shutter speed to freeze any movement, necessitating a wide aperture to keep the image noise associated with a high ISO to a minimum.
This ever-changing nature of the celestial lights also makes stacking multiple exposures for noise reduction problematic, as detail will be lost between frames. To this end, a fast, wide-angle prime lens is ideal for aurora photography, as it allows more light to be gathered in a single exposure.
Given the inclement weather found in many of the best aurora watching destinations, a sturdy and easily adjustable tripod is essential for a productive experience. Although not essential, a remote release should also be considered as it reduces camera shake, makes timelapse photography more efficient and is considerably easier to operate than the shutter when wearing winter gloves.
Focusing–infinity
Generally speaking, photographers will focus to infinity when capturing the aurora as this gives sharp lights and stars. The deep depth of field associated with wide-angle lenses and lack of nighttime shadow detail means it usually doesn’t matter if nearby objects are slightly out of focus. For perfectionists, it is possible to focus stack the foreground.
Use manual focus but don’t twist your focus ring to the furthest left or use the infinity symbol, as on most lenses this is incorrectly marked. It is better to manually focus on a bright star, planet or distant house/streetlight on the horizon. This sets your lens at infinity; some people use tape to fix it in position.

Aperture – f/1.4–f/4
Try to use as wide an aperture as possible. If your lens does not perform well wide open, plan for some cropping when post-processing to remove any corner stars with bad aberrations.
Shutter speed
Your shutter speed will largely be determined by how fast the aurora is moving; generally, consider 15–30 seconds for slow-moving auroras like arcs and diffuse glows, 5–15 seconds for bright dancing pillars, and 1–5 seconds for high activity overhead coronas. Keep in mind that the NPF rule (or 500 rule if preferred) still has to be observed to achieve pinpoint stars.
ISO 800–8000
Use the ISO as the final control of the overall exposure. If your image is too dark, increase the ISO; if it is too bright, reduce it. Be careful not to clip the highlights by going too high, a mistake easily made on high activity evenings, especially when the aurora brightens unexpectedly. For those with ISO invariant cameras, shooting at a lower value and then increasing the exposure in post will prevent this.
Focal Length: 12–24mm
It is not uncommon for the aurora to fill the entire sky, making a wide-angle lens ideal. A shorter focal length also reduces any relative movement, allowing a longer exposure and subsequently lower ISO. If in doubt, somewhere in the region of 14–24mm on a full-frame camera is usually perfect.
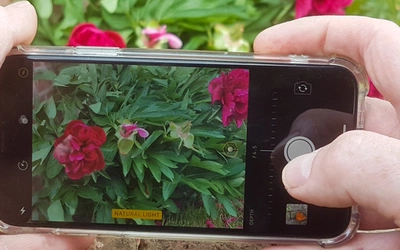
Using a smartphone
Recent developments in smartphone camera technology now make it possible to capture the aurora using your phone:
- Make sure your battery is fully charged
- Turn off all apps to save power
- Attach your smartphone to a suitable tripod in a landscape orientation
- Set your smartphone camera to manual mode or use a camera app (see below) if it doesn’t have a native manual camera app
- Use the same settings as described in the grey box
- Some smartphones have native Night Modes that take multiple images and combine them. These can often be used handheld without the need for a tripod.
Recommended apps include – NightCap Camera (iOS), Cortex Camera (iOS & Android), Northern Lights Photo Taker (iOS) and ProCam X (Android).

But most of all…
Remember to put the camera down and spend some time watching one of the most spectacular natural displays as well.
The best of luck capturing the aurora and do feel free to get in touch if you have any questions or need any help.
For more information on photographing the northern lights and choosing suitable locations in Iceland – see James’ photo-location guidebook, Photographing Iceland.