How to walk a Camino without blistering pain
Don't let blisters ruin your Camino; follow Nicole Bukaty's top tips instead.
There is this thing that pilgrims do which bamboozles me and, in truth, fills me with admiration. They keep walking even when bearing multiple, ferociously painful blisters on each foot (which I am not sure I’d be able to do). At the same time, in the afternoons and all evening, they ask and ask again what they should do with the horrific blister, and everybody present in the albergue will give them their extensive variety of remedies. These range from patching it up, wearing two pairs of socks, leaving it well alone to see what happens or going through the process of needle and thread to drain the blister and then hide the atrocity with the infamous blister plaster (often sold in very small amounts and in unrealistic sizes, at a very expensive rate).
The Camino de Santiago blisters become the protagonists of the journey and often spoil the day as each step is much, much harder. In the evenings, the blisters can take over, at times keeping a pilgrim in bed with threads dangling out of their feet in all sorts of knotted and twisted directions rather than allowing that pilgrim to discover the spectacular history, culture, and gastronomy of the village or UNESCO World Heritage Site they have chosen to sleep in. 'Why do these blister plaster packets not come with instructions?' I ask myself repeatedly as I watch and console the pilgrims who are in agony.
Camino blisters are the ones in control of you and it shouldn’t be like that.
After being on the Camino 10 times now (with no blisters, touch wood), as well as several other long-distance, multi-day routes, it has been well and truly consolidated in my mind, confirmed beyond any doubt, almost to the point of being a philosophical axiom, that the only cure for the dreaded blister is to prevent the misery in the first place. It is known that we should be wearing a set of shoes that have been well 'worn in', and that is decidedly a key starting point (do not wear a new pair of shoes!). Hiking poles or sticks are also a well-known must-have. Yet, there are several other solutions to consider, so here are my top tips for walking a Camino without blistering pain.
Tip 1: take two pairs of shoes
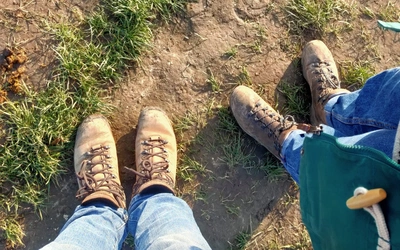
Take two pairs of shoes on your pilgrimage. Bring along a trail running shoeor a comfortable trainer with a decent grip (the sole will simply wear down with the asphalted and paved sections, so often your favourite trail running shoes may not have the grip you need for more rugged terrain after your pilgrimage). (NB: heat and hiking boots do not make for a good combination on warm days along the roads, and I would not suggest hiking boots for the Camino unless you plan to do some more remote caminos in mountainous terrain.)
The second pair of shoes I would advise you to have as your spare is a hiking sandal. Yes, yes, I know that pilgrims bring along their flip-flops because they are lighter however, apart from flip-flopping about in the evenings, they are not a good pair of shoes to change into while still walking the stage and once your feet have tired of the first pair. As mentioned, the asphalt can be long and the relief from changing your shoes into something lighter is a benediction, especially in the heat. Personally, I don’t combine this option with socks, but many pilgrims do.
Bonus tip! We underestimate the number of kilometres we end up walking on cement or asphalt and the impact this causes and, when training we rarely consider road-walking as a good preparation option, whereas, in reality, 20km on pavement is the best you can get ahead of your pilgrimage.

Tip 2: listen to your feet, avoid blisters by applying plasters early
Second, listen carefully to the signs and tweaks from your precious feet. After all, it is those two that are taking you to Santiago so be kind to them. From day 1 (and I know it’s hard because of the excitement of being on the camino, the sense of setting off, a wonderful conversation you may be having with a new pilgrim friend), just simply stop walking for a few moments when you feel any slight hint of discomfort within your shoe. This can be a twisted sock, a slight bit of friction or, even worse (as you have left it too long already), a stinging as if there has been chafing, too much rubbing, somewhere along your foot, on your toes or your heel.
Stop, and then, at this precise moment, put that blister plaster on! The blister plaster is not a product used for healing blisters. In fact, its sole purpose is to provide a second skin for your own skin before the blister appears. By putting on a second skin it will be that second, robust skin, the plaster, which will suffer.

Tip 3: rest, refresh, and elevate
When taking a break, give those smelly feet a breather by letting them escape the entrapment of the sweaty socks and shoes. As a wise pilgrim from Belgium puts it: 'Love your feet as much as you would like to be loved'. A fountain, a river or a lake (and, occasionally, a piscina municipal, which is a local swimming pool costing between €1.5 and €4) are perfect opportunities for your feet to feel a sense of cooling down from the warmth, so bathe them and don’t rush these blessed instances of respite.
Indeed, to help your feet stop swelling (and therefore, to maintain the normal size of your feet and not outgrow your shoes all of a sudden), refresh them and elevate them whenever possible (higher than your heart). And move those dear toes about during a break, stretch and flex them and your ankles, and even on a terrace at coffee or lunchtime, give them a proper rest just as you do for the rest of your body.
Tip 4: adjust footwear and lacing for terrain
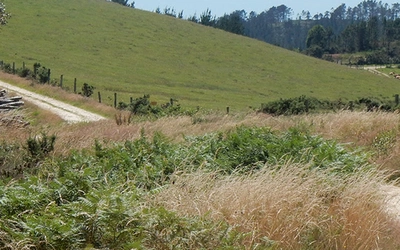
Adapting to the terrain and weather is essential. Remember, walking in different climates and on different terrain means walking with different feet. In very warm weather, in humid climates or wet weather, numerous changes will occur to your feet. They may swell or become a little bit damp and wrinkly. All of this will mean that your shoe, however comfortable it had always been, will feel strange at times. Again, the camino can involve treading many kilometres on one single day along asphalt or paved terrain. Adding to this, you will be now wearing a heavy backpack for extended stretches each and every day over several weeks, if not months.
On long road sections in dry weather, for my part, I tend to swap to my hiking sandals and try to walk on any grass or gravel along the side of the road, however narrow it may be. Combining the pack with the asphalt will have a significant impact on your feet and the friction they will endure, just as when going uphill your heels will contact the back of your shoe more (scrape, scrape, scrape), and downhill can be a horror story for your toes (poke, poke, poke).
This constant plodding along (stamp, stamp, stamp), particularly on concrete, will create blisters and the only solution is to prevent their nasty formation. Hence, depending on the slope and terrain, you may want to play around with how tight your shoelaces are. Ideally, if you tighten your laces, your foot will not move around as much, which is most helpful for your toes when walking downhill for prolonged periods.
It really is just a process of slowing down to check your feet and dealing with a situation before it presents itself. And when you go slower, and stop, there may be some camino magic to encounter, which would have been missed had you not taken that rest.
Buen Camino, peregrinos!


