Tips and advice for fastpacking New Zealand’s Te Araroa trail
Joséphine Anselin offers inspiration, tips and practical recommendations for anyone looking to fastpack New Zealand’s Te Araroa trail – a 3000km route stretching from Cape Reinga in the North Island to Bluff in the South.

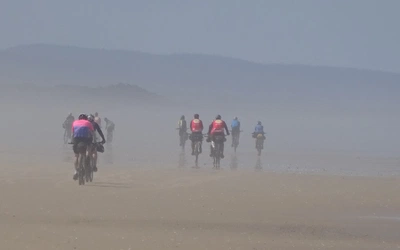
Standing by Cape Reinga lighthouse, I looked down onto an interminable stretch of white sand: the Ninety Mile Beach. I had a huge smile on my face. This beach represented the starting point of my self-supported journey on foot across New Zealand. A running adventure that I’d spent months preparing for.
To help you prepare, I’d recommend checking out the Cicerone Fastpacking guidebook. Through this journey I wanted to challenge myself, both physically and mentally. I wanted to attempt something that I knew would take me outside my comfort zone. I wanted to disconnect from the busyness of life, be immersed in the wild and reconnect with nature.
Over the next three months, I would be running, hiking and fastpacking along unspoilt beaches, up and down rocky mountain tracks, along old railway lines, through dense forests, and even up volcanoes – carrying everything I needed in my 35l backpack, sleeping under the stars, and learning many lessons along the way. If this sounds appealing and you are thinking about fastpacking the Te Araroa trail, you’ll find below some practical tips that will help you prepare for this wonderful adventure.
When to hike the Te Araroa trail
The season spans from late September until end of April. Outside this window, some sections of the trail are closed due to lambing, forestry activity and other seasonal events. Within the Te Araroa hiking season, the best time to start your fastpacking adventure depends on whether you are heading southbound or northbound, and how fast you’re expecting to travel along the trail.
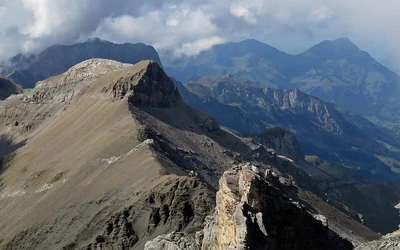
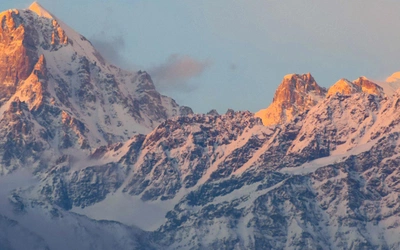
The South Island high country and the Tararua ranges in the North Island tend to be the areas with the harshest weather conditions. It’s best to avoid those sections after mid-April when temperatures start to drop as winter approaches.
However, it’s important to keep in mind that the weather in New Zealand is unpredictable all year round. You’ll need to be prepared for rain storms and even snow regardless of when you’re on the trail. Most southbound thru-hikers start the trail between late September and early December. If you’re heading northbound, the start day tends to be between December and early January.
Fastpacking
Multi-day running adventures: tips, stories and route ideas
£16.95
Guidebook to fastpacking - multi-day running trips carrying the bare essentials - in the UK, Europe and beyond. Includes 12 route ideas (all tried and tested), fastpacking stories from around the world (featuring Jez Bragg, Anna Frost and Jasmin Paris), and invaluable tips and tricks to help you prepare for your own running adventure.
More informationHow runnable is the Te Araroa?
This is a question I wish I had asked before setting off on my Te Araroa fastpacking adventure. I had planned to cover around 40km per day, taking around six hours, leaving plenty of time for rest and recovery in the afternoons. However, I quickly realised that the terrain on the Te Araroa can be quite challenging.
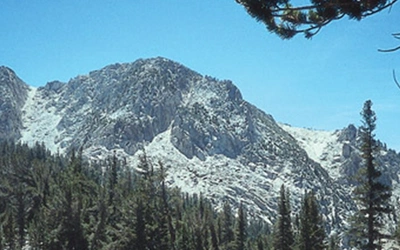
There are sections on back country gravel roads, forest trails and along beaches where you’ll feel like you’re flying. But there are also many technical parts through muddy forests, boggy fields, and up steep rocky mountain tracks. Progress on those parts of the trail can be extremely slow and tiring.
Training for your Te Araroa fastpacking adventure
The approach I used to get ready for fastpacking the Te Araroa was similar to the way I train for multi-day stage races. The goal was to get my body (and mind) used to long, slow running days without much time for recovery.
The two most important components of my training plan included back-to-back long runs on hilly terrain and regular runs with my backpack on. I also added weekly strength sessions to prepare my shoulders and back for the extra load caused by running with a pack.
Prior to setting off I worked with a physiotherapist to come up with a tailored stretch routine. I tried to do the exercises every morning and evening on the trail to minimise the risk of getting injured.
Navigating on the Te Araroa
Navigation has never been my strength. So during the preparation phase this was the aspect I was the most worried about. Luckily, navigating on the Te Araroa turned out to be much more straightforward than expected.
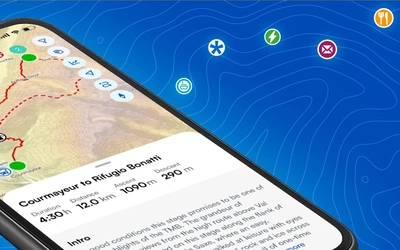
First of all, the route is waymarked using orange triangles and the Te Araroa logo. When I couldn’t find markers, or if I needed to plan ahead, I used the Guthook Te Araroa app combined with the Te Araroa trail notes, which can be accessed on the official Te Araroa website.
Top tip: if you’re planning on using a phone app as your primary method of navigation, be sure to bring a waterproof phone case – my phone definitely wouldn’t have survived New Zealand without it!
As a back-up I also had a Garmin GPS with the trail maps uploaded (the GPX files for the entire route can be downloaded for free on the Te Araroa website). And in case all of my electronics had failed I had paper maps and a compass. Luckily, I never ended up using them.
Where to stay on the trail
Overnight accommodation on the Te Araroa trail includes backcountry huts, camping, hostels and B&Bs, and even 'Trail Angels'.
Backcountry huts
In the South Island there are backcountry huts scattered all along the trail. These basic huts are truly part of the South Island Te Araroa experience. On top of providing shelter for the night, they are also a great place to meet other hikers and exchange trail stories. The huts are managed by the Department of Conservation (DoC). You can stay in them by purchasing a DoC Hut Pass or by paying a single night fee.
Camping
There aren’t many backcountry huts in the North Island, and even in the South Island, it’s not uncommon to arrive at a hut and find that it is already full. So, bringing a tent or another type like a bivy bag or a tarp, is necessary. If you want to keep your costs down when the trail passes through towns, you can also stay in privately run campsites rather than hostels or B&Bs.
Hostels and B&Bs
The trail frequently passes through towns where you can resupply with food and treat yourself to a real bed and even a shower. The YHA website is a useful resource and the TA trail notes also provide a list of recommended hostels, B&Bs and hotels for each town.
Trail angels
'Trail Angels' are people who live along the trail and want to help hikers, either by providing food, a space to pitch a tent or even a bed for the night. You can find out more about trail angels on the Te Araroa trail on their website.
Food resupplies and drinking water
The Te Araroa passes through many towns along its route, making resupply much simpler than on other long-distance trails. The number of days of food you will need to carry depends on how fast you’re moving between towns. On average I carried around 2 to 4 days of food at a time in the North Island and between 4 and 6 days of food in the more remote South Island.
The longest stretch without food resupply options tends to be the Richmond Ranges in the South Island high country. To resupply on the Te Araroa you can buy food in supermarkets when the trail goes through a town or pick up a food box that you have sent in advance. The latter requires more planning. But it’s a good option for the northern part of the South Island where grocery stores are rare and very expensive. If you want to minimise the amount of food you carry you could also hitchhike into towns off-trail to restock on food more frequently.
Aside from one day when I knocked on a local’s door to ask to fill up my water bottle, it was easy to find water along the trail. Each day, you’ll pass rivers and streams, and most backcountry huts either have a water tank or a stream nearby. When I camped wild, I always pitched my tent next to a river or other water source to access plenty of water for dinner and breakfast. I carried a water filter and filtered all of the water I drank, to be on the safe side.
What to pack
Running with a heavy pack increases the risk of injury. So when packing for the Te Araroa I tried to minimise weight without compromising safety. Every item was carefully selected and had a specific purpose.
One of the most rewarding aspects of life on the Te Araroa was living without any unnecessary 'stuff'. I discovered that the true joy of the trail lies in experiencing nature’s beauty, being in the wilderness, and connecting with like-minded people. These experiences brought me more happiness than any material possession ever could.
Below is a list of the main items I carried on Te Araroa. For more details on what to take, and how to select the best suited pieces of equipment for your fastpacking trip, check out the Fastpacking guidebook.
- 30-35L backpack with a waterproof liner (it rains a lot in New Zealand, even in the summer!)
- Tent, bivy bag, or tarp
- Sleeping mat and sleeping bag
- Trail running shoes and socks
- Running clothes (be prepared for all weather conditions!)
- Evening clothes (fleece or down jacket, leggings, top)
- Stove, fuel, lightweight pot, spork
- Water bottle and water filter
- Phone, GPS, maps and compass
- Battery pack to recharge phone and GPS out on the trail
- Head torch with spare batteries
- Running poles
- Toiletry items
- First aid kit and survival blanket
- Repair kit (duct tape, mini sew kit)
- Small journal and pen